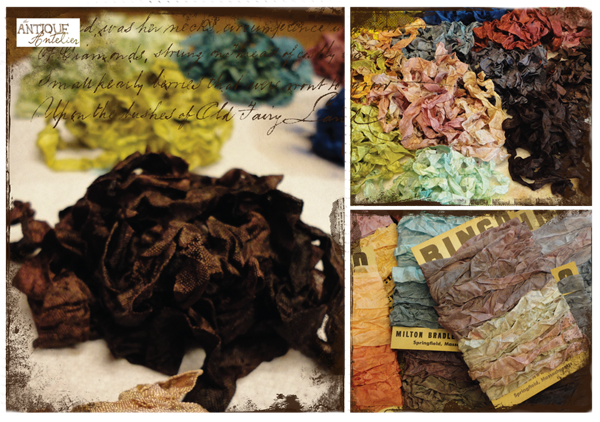
This is not exactly a Master or old school technique here, but dyeing fabrics has always seemed like a fun extension of the artistic realm. I have always been a fan of ribbons and have collected a variety of vintage trims. Wishing to replicate the color and look of vintage ribbon led me to rayon ribbons.
There are a variety of sellers online at etsy and you can see many of the single-colored rolls at Britex Fabrics in San Francisco for around .40 a yard. However to save money, I went to the source and purchased three rolls of 100 yards a piece. I also went to the local craft store and found Rit dyes on sale for about 1.17 a pack. Online they have a great dye color mixing chart which I looked at but didn't follow exactly. It is a great starting point but you will get the hang of it when you are doing the steps below.
GETTING STARTED:
- Dyes (others besides Rit will work as well, but goodness they are cheap.)
- Hug Seam Binding -Rayon Ribbon (standard white)
- small bowls (1 for each color or premixed color shade)
- large bowl
- warm water
- plastic gloves (12 pack at dollar store)
- plastic wrap
- microwave
- paper towels
- brush- (I used a small flat, synthetic brush)
- small plastic snack bags (for opened containers of dye powders)
- permanent marker (for labeling dye bags)

THE PROCESS:
- Prepare your work area for a messy project! Lay towels down and get a cheap shirt and your plastic gloves on.
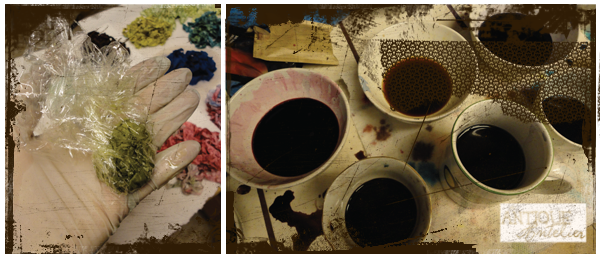
- Put small bowls out and fill half way with water. Sprinkle packet dye in (slowly). Using the brush- get all grits mixed in, and spread the dyed water up the side of the bowl to test the shade. You don't need much dye unless you want a bright or dark shade. You will have a lot of dye left over.
- In large bowl- fill most way up with warm water.
- Prepare yardage by cutting into 3-5 yard sections. (Optional but helpful)
- Drop yards into large bowl to get entirely wet. Take care to spread yards out so that the layers are not stuck together (as if rolled). They can get awfully tied up, so leave them on counter in bunches until you want to work with them.
- Gather one group of ribbon in your hand. Squeeze most of the water out.
- Holding it in your hand, dip one end carefully into the color. Squeeze out. (This can be beautiful with just one color and you could stop here for a light washed effect.) Look at color and re-dip in color if you want it darker.
- Using both hands, spread bunch apart and re-fluff it into scrunch ball.
- Repeat step 7 and 8 with another color. For darker colors, re-dip as needed.
- If you want to have spots of another color, use your brush to grab a bit of dye, and drop it on the fabric. This is great for lighter colors, such as rose with wine or purple splashes.
- Squeeze fabric into small ball in the center of a small sheet of plastic wrap. If there is a lot of excess dye, squeeze this out over sink or another waste only bowl. Wrap the ends of the excess plastic wrap around it. (Some people just place ribbon on plate and microwave it with plastic wrap cover. Afterwards they scrunch it into ball and put it in the corner of a bag to airdry.) Make sure you squeeze the ends of wrap tighter than what is seen in photo above.
- Microwave ball for 2 minutes.
- When it comes out you can let it sit or pull it out (if you are anxious to see the result like moi.)
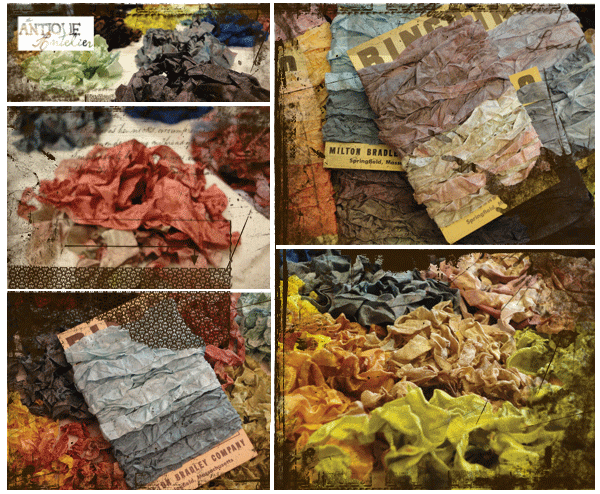
- This technique will get a really fabulous wrinkle effect. They will be mostly dry at this point, but I let them air dry overnight on towels. The next day I wrapped them on my vintage Bingo cards to get them organized.
- White will work really well as the starting ribbon shade. You don't need to worry about purchasing a whitener or bleaching as you simply limit the time the ribbon is in the dye or add more water to the bowl.
- Reverse of white- put more dye in bowl for a truly bright or dark shade.
- Red is a difficult color to get exactly the way I wanted it. I purchased a variety of red dyes including some from other brands (idye and Jacquard) but found that adding brown and black worked wonderfully for "antiquing" the Red to the desired shade.
- Turquoise Blue is fabulous and works well with green/yellow; dark blue; black; browns and even pinks/reds.
- Tip: Wash your gloves after mixing dyes and in between each ribbon color change. Getting splotches on finished dye totally sucks. :)
- Tan is alright but I think Cocoa Brown is great as you can use if full strength or dilute it to a light brown which is good for a final "wash" over a different color.
- Tip: Don't use dishes that you will reuse for eating.
- Tip: Adding some salt to the dye will help it stay more permanent than heating alone.


No comments:
Post a Comment